
Understanding Subfloor Moisture Damage
Definition and Importance of Subfloor Integrity in Home Structure
The subfloor is a key structural component in the construction of any home. It serves as a stable, flat surface that is nailed to the top of the floor joists, typically made of plywood or oriented strand board (OSB). This layer supports the weight of everything in the house, including furniture, appliances, and foot traffic. Ensuring the integrity of the subfloor is crucial for maintaining the overall structural stability of the home. Specifically, a well-maintained subfloor distributes weight evenly and protects against moisture from below, contributing to the thermal insulation of the home.
Common Types of Moisture Damage That Can Affect Sub flooring
Sub flooring, whether made of wood or concrete, is susceptible to various types of moisture damage, which can cause several issues:
- Cupping and Warping: Excess moisture causes the subfloor material to expand unevenly, leading to warping or cupping.
- Discolouration: Prolonged exposure to moisture can cause dark spots or stains to appear on the surface of the subfloor.
- Mildew and Mould Growth: High moisture levels create a conducive environment for mildew and mould to thrive, compromising indoor air quality.
- Structural Weakness: Persistent moisture can degrade the subfloor material, leading to spongy or bouncy floors and even structural failures.
Impact of Moisture Damage on Overall Home Value and Safety
Moisture damage to the subfloor has a significant negative impact on the overall value and safety of a home. Firstly, compromised sub-flooring can lead to structural instability, making floors unsafe to walk on and potentially causing injuries. Visual imperfections such as warping and discolouration detract from the aesthetic appeal of the home, subsequently lowering its market value. More critically, moisture damaged subfloors can foster mould growth, leading to health hazards from poor indoor air quality and respiratory issues.
Furthermore, any noticeable defects like sagging floors, musty odours, or the presence of pests due to rotting wood are likely to require extensive repairs or replacement. These repairs are often costly and time-consuming, further reducing the home’s desirability to potential buyers.
Understanding subfloor moisture damage is essential for every homeowner looking to maintain the longevity and safety of their property. Continuing with this topic, it is important to delve into the common causes behind subfloor moisture issues.
Common Causes of Subfloor Moisture Issues
External Sources of Moisture
Subfloor moisture issues can stem from various external factors. Flooding is a significant contributor, as excessive water can seep into the subfloor, causing immediate and long-term moisture damage. Like flooding, storms can introduce large volumes of water into a home’s structure, overwhelming drainage systems and allowing water to infiltrate the subfloor.
Groundwater seepage is another external source. When the ground surrounding a home is saturated due to high water tables or poor drainage, moisture can rise through the foundation and subfloor. This process, known as ‘rising damp,’ can continuously feed moisture into the subfloor, leading to persistent issues if not properly managed.
Internal Sources of Moisture
Indoor water sources can also lead to subfloor moisture problems. Plumbing leaks are one of the most common culprits, with water escaping from pipes, fittings, or fixtures and saturating the surrounding structures. Burst pipes, particularly in colder climates, can release large amounts of water quickly, creating severe subfloor moisture damage.
Appliance malfunctions, such as a faulty washing machine or dishwasher, can introduce significant amounts of water onto the floor. This water can seep through to the subfloor, causing moisture damage if not addressed promptly.
Environmental Factors
Environmental conditions within a home can also engender subfloor moisture issues. High humidity levels are a primary factor. As relative humidity increases, materials like wood absorb moisture and expand. Conversely, when humidity levels drop, these materials release moisture and contract. Such dimensional changes can lead to warping, cupping, or gaps between boards, affecting the integrity of the subfloor.
Poor ventilation exacerbates humidity problems by trapping moisture inside a home. This lack of air movement prevents the drying out of moisture-laden areas, allowing humidity to persist and moisture damage the subfloor over time. Additionally, in winter, the build-up of water vapour due to closed windows and doors can cause condensation on cooler subfloor surfaces.
Given these diverse sources of moisture, it is clear that maintaining a dry and stable subfloor requires vigilance regarding both external and internal conditions. Ensuring proper drainage, fixing leaks promptly, and maintaining adequate ventilation are crucial steps in preventing subfloor moisture problems. Regular checks and proactive measures can help sustain the integrity of the home’s structure. As we explore the ways to identify and address these moisture issues, the significance of early detection and regular maintenance becomes increasingly evident.
Identifying Signs of Moisture Damage

To effectively manage and mitigate subfloor moisture issues, it’s crucial to identify the initial signs of moisture damage early. Being proactive can prevent minor issues from escalating into significant structural problems.
Visual Indicators
One of the first warning signs of moisture damage in sub flooring is visual changes to flooring materials. The following indicators should raise concern:
- Warping: Wood floors, in particular, absorb moisture and become warped. This can cause the planks to bend or twist, leading to an uneven surface.
- Cupping: This occurs when the edges of a wooden board rise higher than the centre, resulting in a concave shape. Cupping often points to excess moisture at the edges.
- Discoloration: Dark spots and stains are common signs of prolonged moisture exposure. You might observe this in the form of black splotches, faded colours, or visible water stains on the wood or other flooring materials.
These visual indicators are often the first signs homeowners will notice. For a closer look at these issues.
Physical Signs
Visual changes are not the only indicators; the feel and sound of the floor can also provide clues regarding moisture damage:
- Spongy Floors: A floor that feels soft or spongy underfoot is a clear indicator of subfloor decay due to moisture. Areas that were previously solid may now give way slightly.
- Squeaking: Floors that squeak or creak as you walk can also signal moisture damage. This noise usually occurs because the structural integrity of the sub flooring has been compromised.
- Unusual Give: Walking on floors that have an unusual amount of give or feel bouncy can indicate severe subfloor damage, possibly due to joist failure or long-term exposure to moisture.
These physical signs often accompany the visual damage and substantiate concerns about the subfloor. Moreover, subfloor moisture damage can pose significant health risks, especially for individuals with respiratory sensitivities. Mould growth, a common consequence of moisture problems, can trigger allergies, asthma, and other respiratory issues.
Secondary Issues
Moisture issues do not just manifest in the physical structure but also create secondary problems. These are often the result of prolonged or severe moisture exposure:
- Musty Odours: A musty or mildew smell in your home is a strong indicator of mould growth. Mould thrives in damp environments and can spread quickly.
- Mould Growth: Visible mould can appear as black, gray, or white spots. This not only affects the subfloor but can pose health risks to the home’s occupants.
Identifying and addressing these secondary issues is critical as they can indicate underlying moisture problems that need immediate attention. Delaying action can lead to severe consequences, including structural damage, mold growth, and health risks. For further details on detecting subfloor moisture and taking the necessary steps to protect your home, contact a qualified professional today.
Early detection is key in preventing extensive damage. Regular monitoring and timely intervention can protect your home’s structural integrity and ensure a safe living environment.
Moving forward, focusing on appropriate testing and assessment methods will further aid in preventing severe subfloor moisture damage. Moisture meters are invaluable tools for measuring moisture levels in wood and other building materials. By using these devices, homeowners and professionals can accurately assess the extent of moisture damage and make informed decisions about necessary repairs.
Testing and Assessment Methods

Professional Moisture Testing Techniques and Equipment
Reliable moisture testing is vital for preventing subfloor moisture damage. Professional methods employ advanced tools and precise techniques. One commonly used method is the Relative Humidity (RH) Probe Test, which uses in-situ probes to measure RH within a slab. This method is recognised for accurately reflecting the moisture conditions inside concrete—a critical factor in assessing subfloor risk.
Another effective method is the Calcium Chloride Test, where a dish of calcium chloride is left on the concrete surface under an airtight dome for 60-72 hours, measuring the moisture emitted. Values above 3 pounds per 1,000 square feet signal a risk of moisture damage.
DIY Inspection Methods for Homeowners
Homeowners can perform basic moisture checks using a combination of visual inspections and simple tools. Visual indicators, such as warping, cupping, and water stains, often provide the first signs of moisture issues. Another common method involves using a moisture meter to detect hidden moisture. These devices measure moisture content in materials, helping identify areas at risk of mould growth and structural damage.
A simple test for assessing indoor humidity is the Ice Cube Test. Place ice cubes in a glass, add water, and stir. If moisture forms on the outside of the glass within a few minutes, the humidity level is high, indicating potential interior moisture issues.
Importance of Early Detection and Regular Monitoring
Early detection of moisture issues is crucial for maintaining the integrity and safety of your home. Regular monitoring helps to identify problems before they become significant, saving on costly repairs and maintaining the home’s value. Professional moisture meters and frequent inspections can detect issues early on, preventing prolonged exposure to moisture and consequent damage.
Consistent moisture monitoring also supports compliance with health standards, ensuring that the living environment remains safe and comfortable. Recognising early warning signs and addressing them promptly can halt moisture penetration and protect the subfloor’s structural integrity, ultimately preserving the home’s overall health and safety.
Moving forward, homeowners can implement key strategies and solutions to prevent and protect their homes from moisture damage. By taking proactive steps to address moisture issues, homeowners can save money on costly repairs, improve indoor air quality, and extend the lifespan of their homes. Investing in preventative measures is a wise decision that can yield significant benefits for years to come.
Prevention and Protection Strategies

Installation of Proper Vapour Barriers and Moisture Protection
To protect subfloors from moisture damage, it is crucial to install effective vapour barriers. Vapour barriers prevent moisture from rising through the subfloor, thus protecting the flooring material on top. Popular choices include polyethylene sheeting, which is cost-effective and commonly used for concrete subfloors. This barrier is laid over the subfloor before installing the flooring, preventing moisture diffusion.
For crawl spaces, a vapour barrier should be laid flat on the floor, securely attached to walls and piers using staples or adhesive. Overlapping seams and using tape to secure them helps ensure a tight seal. For subfloors under laminate flooring, rolling out the barrier to cover the entire area and taping down the edges is recommended.
Ventilation Improvements and Humidity Control Measures
Proper ventilation and humidity control are vital in preventing subfloor moisture issues. Improving ventilation involves ensuring that air can flow freely under the house. Removing obstructions from air vents and creating channels around the foundations to prevent water pooling can enhance airflow. Adding subfloor ventilation systems, such as vents and solar-powered fans, can replace moist air with fresh air, significantly reducing humidity and dampness.
Utilising dehumidifiers in high-humidity environments is also effective. Dehumidifiers work by reducing moisture levels in the air, preventing condensation and subsequent dampness in subfloor areas.
Regular Maintenance and Inspection Routines
Regular maintenance and inspections can preemptively identify and mitigate moisture problems. Routine checks for leaks in plumbing, roofs, and gutters are essential. Regularly inspecting the subfloor for signs of damage, such as warping or spongy areas, can help detect issues early.
Maintaining moisture barriers and ventilation systems is equally important. Periodically check barriers for any tears or punctures and seal them immediately to maintain their effectiveness. Ensuring the ventilation system operates efficiently and is free from blockages will help manage humidity effectively.
These prevention and protection strategies form the cornerstone of maintaining subfloor integrity, ensuring long-term structural stability and optimal indoor conditions. Regular upkeep in these areas will lower the risk of costly repairs and safeguard your home’s value and safety.
Repair and Restoration Solutions

Step-by-Step Process for Addressing Moisture Damage
Repairing subfloor moisture damage is essential for maintaining structural integrity and safety. Here are the steps to effectively handle moisture damage:
- Stop the Water: Locate and fix the source of the water intrusion. This may involve hiring a plumber to repair burst pipes or addressing external water sources like flooding.
- Expose the Sub flooring: Remove any floor covering such as carpets, tiles, or hardwood to expose the subfloor.
- Assess the Damage: Inspect the subfloor to determine the extent of the damage. Mark the damaged areas clearly.
- Remove Damaged Materials: Cut out the damaged sections of the subfloor using a circular saw. Ensure to make straight cuts and remove all affected areas.
- Dry the Area: Ensure the area is completely dry. Use dehumidifiers and fans to speed up the drying process.
- Reinforce Floor Joists: Check and reinforce the floor joists if necessary before installing the new subfloor.
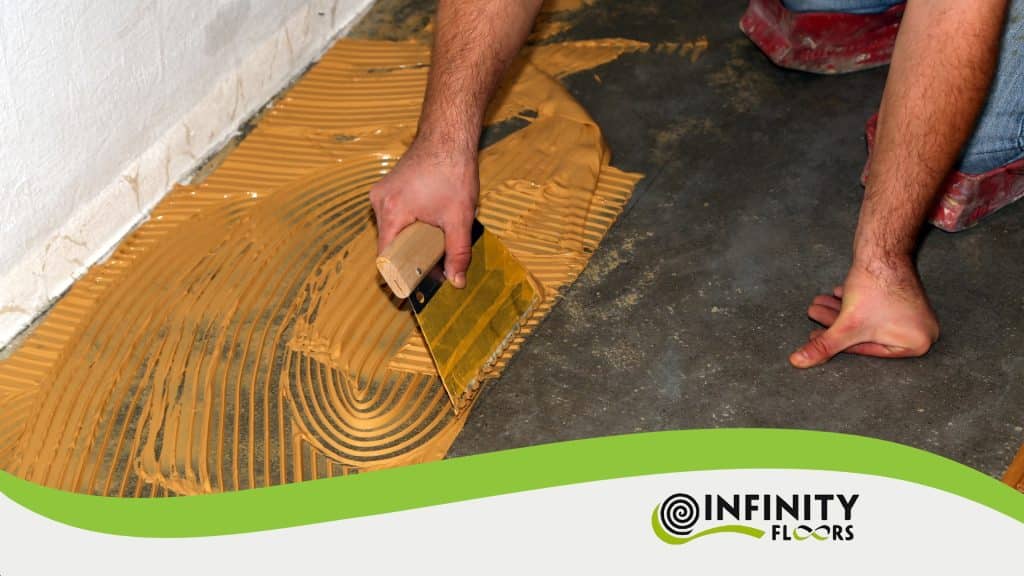
- Install New Subflooring: Measure and cut the replacement sub flooring to fit the removed sections. Secure it in place with nails or screws to the joists.
This step-by-step approach ensures that the damaged subfloor is effectively repaired, preventing further moisture issues.
Materials and Methods for Subfloor Replacement
When replacing a subfloor, certain materials and methods should be used to ensure durability and effectiveness:
- Materials:
- Plywood or OSB: Choose the same type of material as the existing subfloor. Plywood is preferable in damp areas due to its moisture resistance.
- Vapour Barriers: Install vapour barriers to prevent future moisture intrusion.
- Fasteners: Use appropriate nails or screws to secure the subfloor to the joists.
- Methods:
- Precision Cuts: Measure accurately and cut the replacement pieces precisely to fit the damaged sections.
- Secure Fixing: Ensure that all replacements are securely fastened to the floor joists. This can be done using wood screws or nails.
- Proper Alignment: Align new panels so that they are flush with the existing subfloor. This ensures no uneven surfaces or tripping hazards.
Using the right materials and methods ensures the replacement subfloor is both effective and long-lasting.
When to DIY vs. Hiring Professional Assistance
Deciding whether to undertake subfloor repairs yourself or hire professionals depends on several factors:
- DIY Repairs:
- Suitable for minor damage and if you have experience in home repairs.
- Cost-effective as you save on labour costs.
- Requires the right tools and materials.
- Professional Assistance:
- Essential for extensive damage or if structural integrity is compromised.
- Recommended if you lack the expertise or tools needed for the job.
- Ensures the job meets safety standards and regulations.
Professionals bring expertise and can identify and solve potential issues that might be missed by an amateur.
When addressing subfloor damage, ensuring the problem is correctly fixed is paramount to maintaining your home’s safety and value. Understanding when to seek professional help versus going the DIY route can save time, money, and future trouble.


